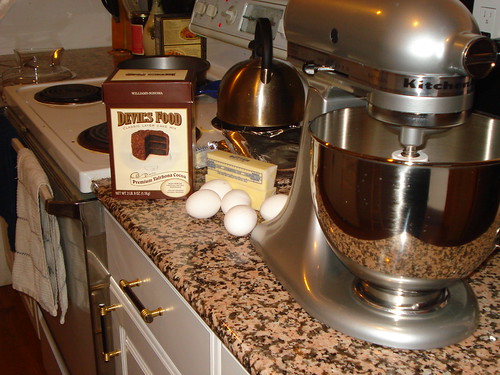
 For Christmas, my mom sent me the SHINY, NEW! mixer pictured above. I've wanted a Kitchen Aid mixer for as long as I've been somewhere that has a kitchen, and this one is a vision of perfection in stainless steel. For my first attempt at using the mixer, I thought I'd try out something simple. A cake mix that I picked up at Williams Sonoma. Sure, I could make everything from scratch, but I don't see that this was all that far from being homemade.
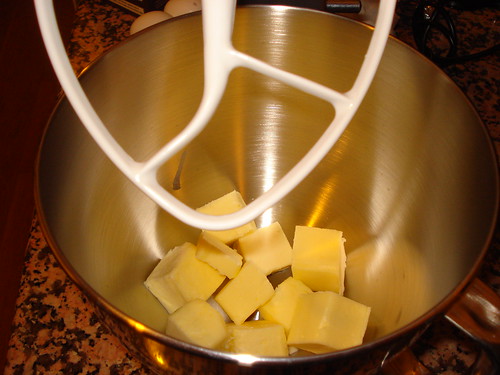
The cake started out with butter...lots of it. And what felt like 2 pounds of sugar and nearly half a dozen eggs. As I was putting it together, all I could think was, this cake had better be moist and awesome for all of this butter that's going in it. If you look closely (and can visually measure butter sticks) at the picture above, you'll see that it's 2 1/4 sticks in all.

I combined all of the butter, eggs, and sugar until it was totally smooth. The cool thing about this mixer is that I put the lid on, and just walked away as it did all of the work for me. I came back about 5 minutes later with completely smooth butter-sugar base to add the cocoa flour to round out the batter. The photo above is the fully combined cake batter.
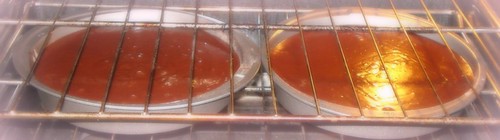 Now, when putting the batter into the prepared pan, I have a couple of tricks that seem to work very well for keeping the cake flat (to minimize the amount you have to cut off to keep it flat), and to ensure that it comes out smoothly. First, when making the batter, I hold off about 1/2oz of the dry batter. Then, I lightly grease the pan all around the bottom and sides. I use the dry batter to dust the greased pans, and sometimes will even brush it to make it even. Then, I pour in the batter, and put the cakes in the oven. Above, are the two layers of cake in the oven, before I removed the top shelf to give them room to rise. After the cakes come out of the oven, if you let them cool for about 30 minutes before you try to remove them from the pan, they will come out a lot easier.
 While waiting for the cakes to continue to cool after I'd removed them from their pans, I whipped up the frosting...literally. This was actually a very high quality pre-made dark chocolate frosting from Williams-Sonoma. I had a spoonful before I put it into the bowl, and OMG was it fantastic. Before I whisked it, is was almost black in color. After 1 minute of whisking air into it, it was a rich, cocoa color. I refrigerated the frosting, in the bowl for about 45 minutes.
Once the frosting is chilled, and the cakes are VERY cool, I started the process of priming the cake to be frosted. The first step is to brush off the crumbs of the cake with a pastry brush. Then, cut the risen part of the cake to create a nice, flat top just like the bottom. Do this to both layers. Then, take just a dab of frosting and put it on the center of the plate or cardboard round where you will be frosting your cake. Position the bottom of your first layer (bottom down) onto the frosted dab.
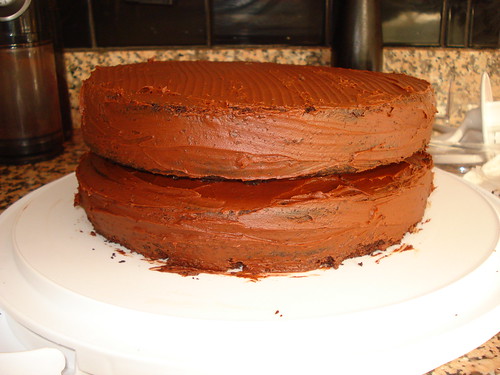 Then, begin to lightly frost your cake. Once the bottom layer is frosted, don't forget to make sure that there is a generous amount of frosting on top of it so there is a nice layer of frosting between the two layers. Then, place the top layer, top down, onto the bottom layer. This will create a nice, flat top for your cake courtesy of the bottom of your cake pan. From there, continue to lightly frost the cake, and scrape off any excess. Then, refrigerate the cake, as is for at least 20 minutes. In the case of this cake, I refrigerated it for about 90 minutes, and it worked like a charm.
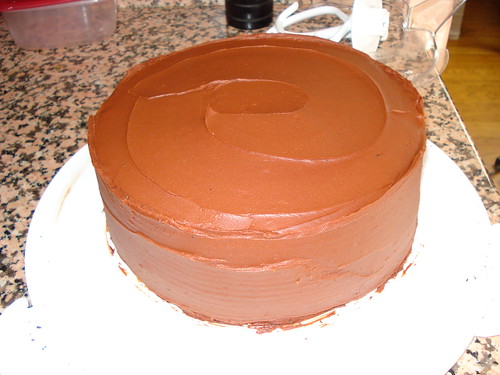
Once your cake is done chilling, then frost liberally all the way around, paying particular attention to the edge gaps between the two layers. In the picture above, you can see the strokes of my frosting knife as I turned it around the cake. With all the frosting that was left, I piled it on the top of the cake and smoothed it out in a circular fashion. Then, I played around with the strokes of the knife until the design I wanted appeared on the top.
Perfection!
No comments:
Post a Comment